4 Easy Steps to Patching a Hole in Drywall
Owning a home is a dream for many people, and that dream requires occasional maintenance, like patching holes in walls. These are usually the result of simple accidents, but repairing them is important to maintain the value of your home. It can be a hassle, but repairing a hole is not a nightmare. In fact, it is one of the easiest home repairs that you can make! Follow these four steps to accomplish the simple fix.
1. Clean the Surface
Before you begin repairing your wall, clean the surface where the hole is located. If you don't take the time to clean the to-be-fixed area, your paint may not seal correctly. To properly clean the surface for dirt, dust, and oils, lightly dab and wipe the area around the hole with a damp cloth and mild detergent. When cleaning the surface, don't drench it; otherwise, your paint will not stick properly. Once you are finished cleaning the area, dry it gently with a towel.
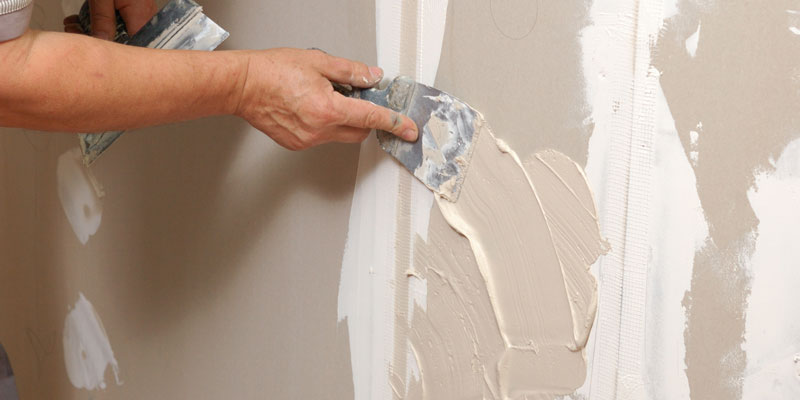
2. Patch the Hole
Once the surface around the hole is completely dry, it is time to patch the hole. You will want fine-grit sandpaper, a putty knife, and spackling. First, sand the surface around the hole to smooth out the area and remove any fragments of the wall that may remain. Then take your putty knife, and apply spackling to the hole until it is completely filled. If you have any excess putty remaining, sand it away with the sandpaper. The patchwork should take a couple of hours to dry.
3. Paint the Patchwork
This next portion involves two parts: painting the primer color and adding the same color paint to match the rest of your wall.
First, prime your wall with an interior latex primer. Spend a little extra for a higher quality primer if you must; you want to ensure that the patchwork blends in with the rest of your wall. Priming the area will ensure that the spot does not stand out, so do not neglect this part. Paint over the portion of the wall that has been patched up with a medium-sized paintbrush, and remember to paint only within the dimensions of the patched area to ensure that the surface is seamless and consistent.
When you are ready for color paint, match the paint as close as possible to the color of the wall. You could do this is by storing any excess paint from the original paint job. This way, you will have that exact color to match up the area with the rest of your wall. If you did not save any paint from the original job (which may often be the case), then you will need to go out and purchase new paint. Since not all building supply or hardware stores carry the same brands and types of paint, go to the store where you bought paint for the original job and purchase a new can. If they are out of stock or no longer sell that particular paint, look through the paint samples to match your wall. Find the color that is the closest match and purchase that instead. The end result may be a little off, but if you paint it correctly, it shouldn’t be noticeable. When you are painting the patchwork use the same painting instrument originally used when the wall was first painted (if you had a particular kind of paintbrush that you painted your wall with, use the same brush for the touch-up). Use as little paint as possible, but try to paint longer strokes, so the paint blends properly with the rest of the wall.
4. Allow Plenty of Time to Dry and Inspect
At this point, you are finished with the main portion of the job. Let your paint dry for the manufacturer-recommended time before checking your work. Ensure that the touched-up surface matches the rest of the wall. Look at the area from different angles to best tell if you have successfully patched up the wall. Don't be too critical in your assessment. It may be easy for you to notice the repair area, since you know to look for it, so inspect with a grain of salt.
Touch-ups and repairs are inherent maintenance tasks of home ownership. It can be a bit tedious, but take careful steps and work meticulously to successfully patch up any hole. If you have further questions about fixing wall holes or the priming and painting process, contact us for more information.
